Self-hosting Families Sponsorships
Members of enterprise organizations are offered a free Families organization sponsorship that can be applied to a new or pre-existing Families organization and redeemed directly from the web vault.
note
If you're looking for information on updating a license for a non-sponsored self-hosted Families organization, see here.
You will need to enable automatic billing sync to allow your self-hosted enterprise organization to issue sponsorships for cloud Families organizations. To set up automatic sync:
First, you'll need to configure your server to allow communication with our cloud systems.
note
This step must be completed by someone with access to your self-hosted instance's configuration files.
In order to enable cloud communication, set the following line in bwdata/env/global.override.env to true:
BashglobalSettings__enableCloudCommunication=true
If your cloud organization was created on EU servers, you'll also need to set the following values:
BashglobalSettings__baseServiceUri__cloudRegion=EU globalSettings__installation__identityUri=https://identity.bitwarden.eu globalSettings__installation__apiUri=https://api.bitwarden.eu globalSettings__pushRelayBaseUri=https://push.bitwarden.eu
note
The value for globalSettings__baseServiceUri__cloudRegion must match the data region that was selected when retrieving your Installation ID & Key.
Once you have set these values, apply your changes by running the ./bitwarden.sh restart command.
note
Enabling automatic sync requires communication with Bitwarden's cloud systems. If your environment uses a firewall to block outbound traffic, you will need to allow https://api.bitwarden.com or .eu and https://identity.bitwarden.com or .eu.
Once cloud communication is enabled at the server-level, a sync token needs to be passed from the cloud organization you use for billing to your self-hosted organization. To retrieve your sync token from the cloud web vault you must be an organization owner. To retrieve the token:
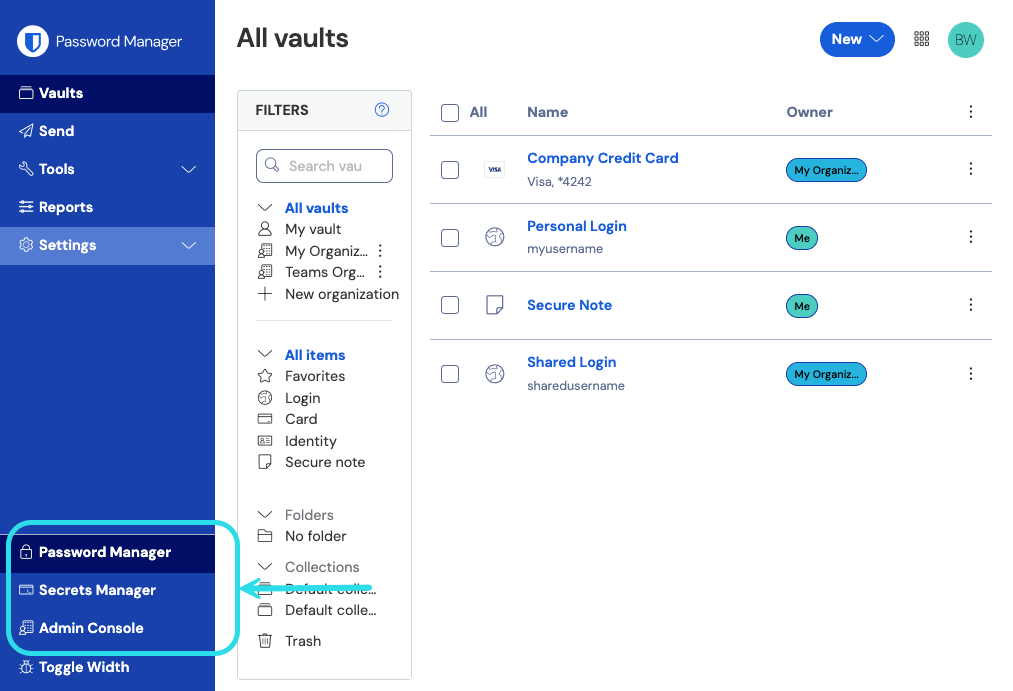
Open the cloud web app and open the Admin Console using the product switcher:

Product switcher Navigate to Billing → Subscription.
Scroll down to the Self-hosting section and select the Set up billing sync button.
Enter your master password and select Generate token.
Copy the generated token.
To apply the billing sync token to your self-hosted organization:
warning
At this stage, if you're upgrading your self-hosted deployment from an earlier version, you may need to manually update your license file before proceeding.
Open the self-hosted Admin Console and navigate to Billing → Subscription.
In the License and billing management section, choose the Automatic sync option.
Select the Manage billing sync button.
Paste your generated Billing sync token and select Save.
note
Sync for Families for Enterprise will occur once daily once you've triggered your first sync. The Last sync field in this section will report Never until you trigger your first sync.
Sync for license updates must always be done manually by selecting the Sync license button (see the next section for details).
Trigger a sync once you've completed setup. Billing sync will occur once daily, however you can manually trigger a sync at any time. To trigger a sync:
Open the self-hosted System Administrator Portal and navigate to Organization and select the enterprise organization.
Locate the Connections section and select the Manually Sync button.
note
If you receive a version not supported error message, update your server and try uploading your license file again. To update your server, make a backup of the bwdata directory and follow these instructions.
In between syncs, users may see the status Awaiting Sync after redeeming or changing a sponsorship. This indicates your self-hosted Bitwarden server is waiting to sync with the Bitwarden cloud before a sponsorship can be fully redeemed or changed.
Suggest changes to this page
How can we improve this page for you?
For technical, billing, and product questions, please contact support